Thursday, December 29, 2011

Mix Your Own Nail Polish


I'm into nail polish.  Despite the fact that it does not stay on my fingers for more than 24 hours without chipping off.  

I love it.  I currently have at least 30 different nail polishes.  It's a sickness.

Anyways, despite having all these different shades, I find myself obsessing over new shades that I simply must have.  Don't ask me why...

This week, I needed my nails to be pale blue.  So I went to Walgreens and the closest shade they had was by Essie.  I think Essie is beautiful and if I weren't so frugal-or cheap, whatever-I would totally buy a bunch of it.

But as it is, I just cannot justify paying more than $8 for one single bottle of nail polish.

So, I saw this cool idea (like, duh, why didn't I think of that) at Crafty Minx blog to mix your own nail polish.

Freaking revolutionary.

I have about half of a bottle of white polish, so I thought I'd mix in some blue to get my desired shade.
I like this Sally Hansen Xtreme wear.  It's like a buck or two and you usually only need one coat.

I started by adding just a few drops of blue to the white, then shaking for several minutes and adding more drops until I reached the shade I was looking for.


I love this blue!  Yes, it seems kind of Easter-y, but I'm calling it my New Year's nail polish.  I might even add some glitter later on.  Maybe on the tips.

Oh, my hand looks so weird without my ring.  Have you ever forgotten to put your ring(s) back on after doing something and just felt like something was missing without it?  I was forming hamburger patties last night and totally forgot to put it back on.  Well, I know that was a riveting story, but for real--I can't wait to get home and get my ring back where it belongs.


Hey--go mix some nail polish.  It's fun :)


Tuesday, December 27, 2011

Frosted Eggnog Cookies


Hi!  I hope everybody out there had a great holiday weekend and enjoyed time with friends and family.

Also, I hope you are not too burned out on sweets.

Because I have a cookie recipe for you today.

Before I get to that, I'm sure you are interested to know that my nephew loved his Guess Who? game!  He is turning 6 years old today (I cannot believe it!).  Happy Birthday to one of my favorite people ;)

Ok, back to cookies...

These cookies are soft and sweet.  They would be perfect to take to a New Year's party or just to munch on around the house.

They are not too eggnog-y, though.  More like a Lofthouse cookie.

Frosted Eggnog Cookies

2 1/4 cups flour
1 tsp baking powder
1 scant tsp ground nutmeg
3/4 tsp cinnamon
1 1/4 cups sugar
3/4 cup butter, slightly softened
2 egg yolks
1 tsp vanilla
1/2 cup eggnog (I used Silk soy eggnog)
1 tsp rum exract

1. Preheat oven to 300 degrees.
2. Mix flour, baking powder, cinnamon, and nutmeg in a bowl and set aside.
3. In another mixing bowl, mix sugar and butter together. Add egg yolks and vanilla to the mixture and beat until smooth.
4. Finally, add eggnog and rum extract and mix on medium speed until smooth and creamy. Slowly add flour mixture into eggnog/sugar mixture until completely combined.
5. Drop spoonfuls of dough onto a prepared cookie sheet and bake for 20-22 minutes. Remove immediately and move to a cooling rack.
6. When completely cool, frost with eggnog buttercream.

Eggnog Buttercream

3 cup confectioners’ sugar
1/4 cup softened butter or margarine
1/3 cup commercial eggnog
1 tsp rum extract

1. In small mixer bowl, beat confectioners’ sugar and butter or margarine until well blended.
2. Gradually beat in eggnog and rum until icing is smooth.

This made 3 1/2 dozen smallish cookies.
Recipe from Tidy Mom


Sunday, December 25, 2011

Merry Christmas

Just wanted to take a moment to say:

Thanks for reading my blog :)  I hope you have a great holiday season!!!


Friday, December 23, 2011

Holiday Recipe Mini Round-Up

I don't know if you know this about me, but I read alot of blogs.  One might say I'm a blog-aholic.

But it's okay, because I can quit anytime I want.

Anyways, I have noticed on alot of the foodie blogs I read, that they are compiling lists of suggestions for stuff you should make for the holiday.

And I thought, "Why not me?"*
*(reference to a Dane Cook joke before he got all unfunny and sold out)

Here we go.

These three would be a great addition to a cookie tray or just lovely on their own.


Crispy Coconut Almond Cookies


Cookie Assortment from 1 Batter


If you are doing a Christmas morning breakfast or brunch, try one of these delish recipes.

Chunky Monkey Banana Bread 


Pumpkin Spice Latte Mini Muffins


 Vanilla Bean Scones


Ok, that's all for my little round-up.  Hope you have a great day :)


Wednesday, December 21, 2011

Gift Idea Wednesday: Last Minute Gift!


Who's ready for Christmas?!  Now that I finished making this last minute gift and painted some candy cane nails, I'm ready to go!

Bring it on, Saint Nick!


Ok, if you are not feeling so confident and you want to add more gifts to your pile under the tree, I have some fun ideas for you :)

If you have an old board game around the house, personalize it!  Change the addresses on Monopoly to addresses in your neighborhood, put your family's pictures on the Life game pieces, whatever.  Figure out how to make it more fun.

And it's totally free!  Yipee!!!!!

Sorry, I got a little excited there.  What can I say, I like free stuff.

My nephew love love loves Guess Who? and will wear it out given the chance (by the way, he has noticed it is missing already).

Personally, I'm tired of seeing Maria's smug look and green beret.  I mean, really, who wears a green beret. Maybe a raspberry beret...but green?  I think not.

Here's how I made it.
I chose 24 pictures and made a grid collage in Picasa (it's a free photo editor--Google it) and printed it.  Then I cut the pictures out using the Guess Who? cards as a template.  They are 1 1/2" wide X 2" tall.

Print 3 copies of your collage and glue stick them to the 2 sets of little cards that go in the holder or just make new cards if you don't want to mess up the old cards.  Also, you'll have to glue pics on the old game cards that you choose to find out who your "person" is (the yellow cards in below pic).


If you have more than 24 people to include, you can make extra cards and switch them out periodically or group people together (like couples).

So cool--I cannot wait to give it to him!

If you are not into cutting and pasting, I also have been making some quick teddy bears using an old pair of corduroy pants that would make great stocking stuffers.

Made them using this pattern from Bev's Country Cottage

If you need more last minute gift ideas, check out my gift idea round-up from last week!

Merry Happy Everyone!!!

Monday, December 19, 2011

Vanilla Bean Scones


I have had scones on the brain for the past few weeks.

Maybe it was my low carb eating plan.

But, scones are delicious.

If the only scone you have had is from Starbucks, you have not had a scone, because theirs are frozen, then thawed, leaving them mealy and dry (just my opinion).

Fresh scones are where it's at.

SCONES
3 cups flour
2/3 cups sugar
5 tsp baking powder
1/4 tsp salt
2 sticks butter, chilled
1 large egg
3/4 cups heavy cream
1 whole vanilla bean
1/2 Tbsp vanilla extract

GLAZE
3 cups powdered sugar, sifted
1/2 cup milk (I used almond milk)
1 whole vanilla bean
Dash of salt

Preheat oven to 350 degrees.
Split the vanilla beans down the middle lengthwise and scrape out all the vanilla "caviar" inside. Stir caviar into cream and add vanilla extract. Set aside for 15 minutes.
Get all the dry ingredients in your food processor (or a big ole bowl, if you don’t have a processor) and pulse to combine.
Cut cold butter into pats, then pulse it in the food processor with the other ingredients or use a pastry cutter until mixture resembles crumbs.
Mix vanilla cream with egg, then combine with flour mixture.
Ok, I’m just gonna quote the Pioneer woman on the rest of the preparation, because she made her scones more elegantly than I did:
“Turn dough onto a floured surface and lightly press it together until it forms a rough rectangle. (Mixture will be pretty crumbly.) Use a rolling pin to roll into a rectangle about 1/2 inch to 3/4 inch thick. Use your hands to help with the forming if necessary.
Use a knife to trim into a symmetrical rectangle, then cut the rectangle into 12 symmetrical squares/rectangles. Next, cut each square/rectangle in half diagonally, to form two triangles.
Transfer to a parchment or baking mat-lined cookie sheet and bake for 18 minutes, removing from the oven just before they start to turn golden. Allow to cool for 15 minutes on the cookie sheet, then transfer to a cooling rack to cool completely.”

VANILLA GLAZE
To make the glaze, split the remaining vanilla bean in half lengthwise and scrape out the innards. Stir it into the milk, and allow it to sit for awhile.
Mix powdered sugar with the vanilla milk, adding more powdered sugar or milk if necessary to get the consistency the right thickness. Stir or whisk until completely smooth.
One at a time, carefully dunk each cooled scone in the glaze, turning it over if necessary. Transfer to parchment paper or the cooling rack. Allow the glaze to set completely, about an hour.


These were so good-not too sweet and not too biscuit-y. They just perfectly melted in your mouth.

We had a surprise birthday tea for my sweet aunt yesterday and out of something like 40 scones, these were the remains:


Recipe adapted from The Pioneer Woman.

Friday, December 16, 2011

Mint Oreo Truffles & A Bonus Recipe


Aw, look at these cuties.

Well, there's nothing new here. I'm sure you have all heard of Oreo truffles.

If you haven't, here's how I made them:

Mint Oreo Truffles

*1 package mint Oreos
*1 container of cream cheese icing (I used the whipped kind)
*White candy melts (or whatever color you want to use)
*Optional sprinkles, nonpareils or crushed candy cane

1. Crush the cookies in a food processor or in a Ziploc with a rolling pin. Mix the crushed cookies and icing until combined.
2. Roll into balls with your hands. I scooped them out with a teaspoon to make them sort of the same size, then rolled.
3. Place on parchment paper and pop in the freezer for 5 minutes. Don't leave them in there longer than that.
4. Melt candy melts per the instructions on the package.
5. Dip each ball into the melty deliciousness and tap off excess.
6. Top with whatever topping before they dry.
7. Let them harden at room temperature and enjoy.


I made these for our office luncheon, and everyone loved them. They were so easy to make, too :)

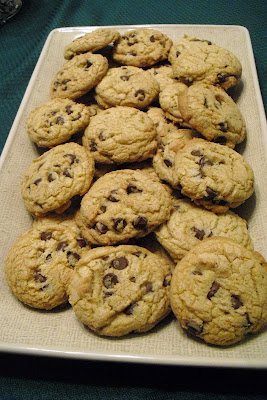
I also made my favorite Perfect Chocolate Chip Cookies, and they were so good looking I had to post a pic:


Guess what?

I have a bonus recipe for you today. But a word to the wise: Look away if you are dieting. This pizza is the devil.

So, you know the beefy, greasy, cheesy Baconator from Wendy's?

This is what would happen if a pizza and a baconator hybrid were created in some mad scientist's lab. Or in my kitchen. Whatever.


My husband loves pizza, but he also craves a big, fat bacon cheeseburger, so I set out to make him the best dinner ever. With no vegetables in site.

He loved it. He assured me of its awesomeness.

Here's how I made it.

1. Used a basic pizza dough recipe (or you could buy a pizza dough)
2. Browned 1/2 lb of ground beef with burger seasoning and a dash of hot sauce
3. Topped the pizza with the following:
*1-2 tbsp ranch dressing
*4 slices provolone cheese
*4 slices crumbled, cooked bacon
*1/2 lb cooked hamburger meat
*about 3/4 cup shredded cheddar
*4 more slices crumbled, cooked bacon


Holy, moly--this is major.


Monday, December 12, 2011

The Great Food Blogger Cookie Swap


It's finally time to reveal my recipe for the cookie swap!

The Great Food Blogger Cookie Swap 2011


I sent packs of these cookies to three fellow bloggy ladies. I hope they liked them!


I modified two recipes that I've used in the past to create a crazy yummy confection of goodness. I cannot tell you how thrilled I was when the recipe made 3 1/2 dozen instead of just 3 dozen--that means I got to keep 6 cookies for me!


So here's my recipe.

Crispy Coconut Almond Cookies
a conglomeration of this recipe and this recipe

2 sticks of butter
1 cup of sugar
1 1/4 cup brown sugar
2 eggs
1 egg yolk
1/2 tbsp vanilla extract
1/2 tbsp almond extract
1 1/2 tsp baking soda
1/2 tsp salt
3 cups flour
1 cup chocolate chips
1/2 cup finely chopped, cocoa dusted almonds
3/4 cup toasted shredded unsweetened coconut flakes

First things first, toast your coconut. I used this lovely tutorial from Baking Bites.

Preheat your oven to 350 degrees and prepare your cookie sheets with parchment paper.

Heat 1 1/2 sticks of butter in a small pan on the stove (on medium heat) until bubbly, whisking occasionally. Once it starts to take on a brown color, remove from the stove. OMG, you just made browned butter! You are awesome.

While you are working on browning butter, put remaining butter and sugars in a large bowl.

Pour the browned butter in a bowl and cream it all together. It will look like a Coke slushie. Just go with it.

Add your eggs (and the yolk) one at a time and whisk. Then whisk in your extracts.

Mix your flour, salt and baking soda in a separate bowl then add slowly to your sugar, butter mixture and combine.

Stir in your chocolate chips, chopped almonds and toasted coconut.

Try not to eat too much batter. This is a serious warning, because this is the kind of batter you would risk eating raw egg for. It's that good.

Scoop your cookie batter onto the parchment using a standard cookie scoop.

Bake your cookies in batches for about 12-15 minutes and cool on a rack.


You could also do a nice chocolate drizzle and sprinkle of toasted coconut to the top, but I had to get these packed up in a hurry. Not because I was behind on a deadline, but because I did not want to eat them all.


Many thanks to the bloggers who sent me cookies, too!
Monique from Ambitious Kitchen sent me some delicious peanut butter cookies with a Rolo baked in the middle.
Hannah from Fleur-De-Licious sent some yummy cherry-walnut Rugelach cookies.
And I just got some awesome fruit and nut cookies from Amy + Janesse at Two True Foodies.