Showing posts with label painting. Show all posts

Monday, October 24, 2011

Halloween Candy Bark


I guess I'm in the spirit of Halloween now. My nephew and I decided to make some candy bark.

Or I decided to and he decided to munch on all the fixings, including the melty chocolate bowl.

Well, it came together pretty easily.

Here's what we used:


White chocolate chips
Milk chocolate chips
Vegetable oil (not pictured)
Halloween cookies (wanted the orange Oreos, but they were out at the store)
Pretzels
Candy corn
Candy corn M+Ms
Orange and black sprinkles

Lay some wax paper on a cookie sheet and have your helper sprinkle a little of each kind of candy, cookie, pretzel and sprinkle all over the wax paper.

Melt some chocolate chips in the microwave with a touch of oil (maybe 1-2 tsp) for 30 seconds at a time, stirring after each interval, until melty.

Pour the chocolate on the candy mix on the wax paper. Then repeat with the white chocolate and drag a spoon around to sort of swirl it.

Pop the tray in the freezer for about 20-30 minutes for the chocolate to set.

Break up pieces with your hands and enjoy.


I personally found this to be too sweet, but we packaged most of it up to share with family and friends. Everyone else seemed to like it. I was probably burned out on all the sugar I ate while making these!

While the chocolate is setting, here is another fun pumpkin painting project to do.


We taped the face on one side by putting a rectangle for eyes, nose and mouth and then drawing what we wanted with a pen. Next I carefully cut the tape around our drawn design with my X-acto knife and peeled off the extra.

My 5 year old nephew wrote his and his newborn brother's name on the opposite side and I cut out the letter shapes with the tape.

Then we painted the pumpkin with acrylic paint and removed the tape.

This pumpkin project was inspired by Young House Love.

Friday, October 21, 2011

Painting a Proper Pumpkin


I don’t really go nuts over Halloween. I know that saying I don’t like Halloween is like saying I don’t like puppies. Remember the Friends’ episode where Chandler doesn’t like puppies? That’s insane. I love puppies, but Halloween-eh. I don’t have children, so I guess I have no reason to get into it.

Well, we moved into our new neighborhood where everyone has dangling skeletons, inflatable characters and pumpkins galore adorning their yards and houses. Um. Feeling a little left out. So I got a pumpkin. Yeah, just one. It’s kind of sparse, but at least we are not anti-Halloween.

I also bought some candy in case we get some trick-or-treaters. Yeah, it’s Dum Dums and Smarties (the cheap, lame candy), but at least I’m not handing out canned goods or something.

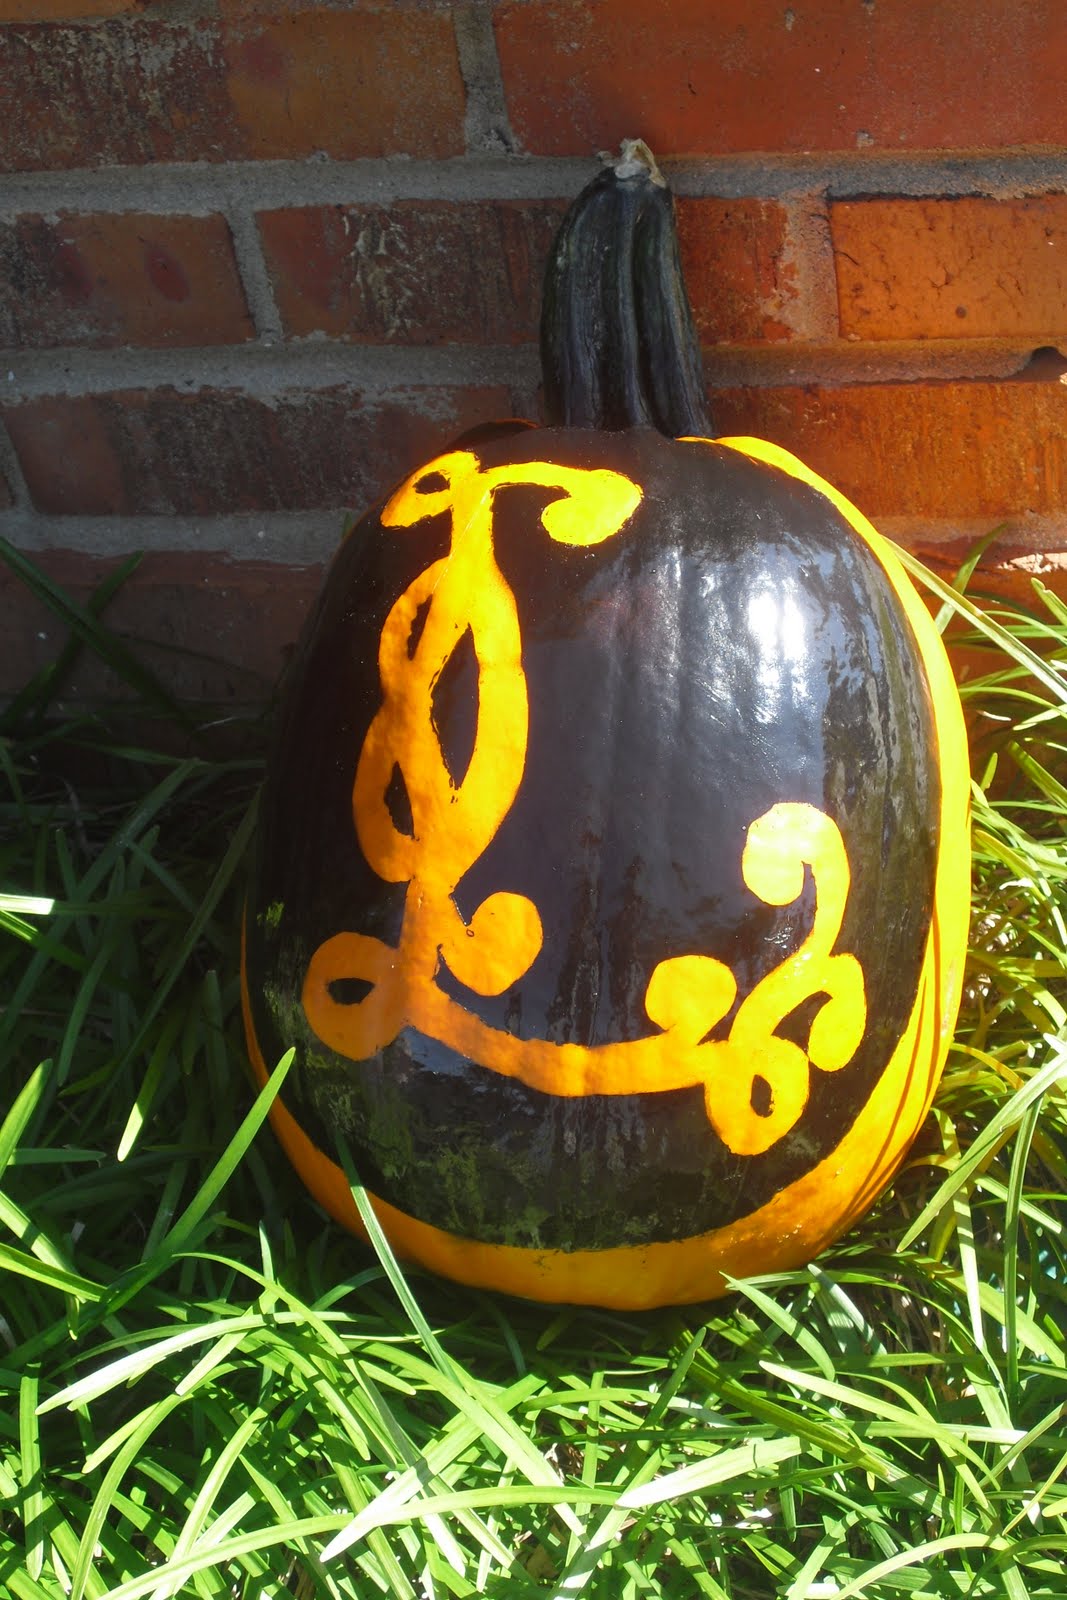
Ok, so back to the pumpkin. I have seen a few monogrammed pumpkins around the web and thought I’d make one, too. That way I don’t have to use sharp objects or touch pulp. And our pumpkin can sit out until Thanksgiving. It’s a win win, really.

Here’s how I did it.

First, I washed my pumpkin. It was filthy. Then I gathered my supplies:


A monogrammed letter of your last name (I found a celtic L on a Google Image search)
Contact paper
A marker
X-acto knife
Something to cut your stencil on (like a cutting mat or cardboard)
Paint (not pictured)—I used black spray paint. You could also hand paint with acrylic if you want.

Trace your letter on the contact paper then cut out. I meant to cut the outline out (so the letter would be painted, not the surrounding area), but I cut the letter out so I went with it and made a circle to go around it.


Ok, at this point I realized that you have to do the letter backwards if you are tracing it with the side of the contact paper with the writing on it. Head slap! Ok, I cut the letter out again. Whatever. Backwards this time.


Then carefully peel off the paper and adhere the contact paper stencil to your pumpkin.


Can you see that? No? Well, it is clear contact paper, so you know…


I spray painted this outside in a box because I am really bad about spray painting other surfaces (ask me about my aqua carport!).

Try to let it dry for like an hour.

I can’t wait!

Let’s see it together:


Oh, well, it got a little drippy.

If you are heavy handed with the spray paint like I apparently am, some nail polish remover and q-tips will do the trick.

There.
All better.


Oh, I just love it. I can feel myself getting in the Halloween spirit ;)