Showing posts with label Fabulous Fall Fridays. Show all posts

Friday, November 4, 2011

Fabulous Fall Fridays: Cheddar Peppers


When some people think of Fall, they think football. I’m not one of those people. I could care less about organized sports. Or unorganized sports for that matter.

Well, these cheddar peppers are great football food or just snack food despite my terrible pictures of them!

My husband loves cheddar peppers and has been begging me to make them for a while now.

As a general rule, I don’t like to fry stuff. The popping hot oil scares me. I’m kind of a weenie. Plus, I’ve heard fried food is bad for you or something.

Regardless, you should make these yummy morsels of cheesy fried goodness for the football fans in your life.

Ok, so I’m going to go ahead and apologize for the utter lack of measurements on my part. This was kind of a fly by the seat of my pants recipe.

*Jalapenos (I used 12, but definitely increase the number if you have a crowd)
*Hunk of Velveeta (about the size of a Rubix cube-maybe a little smaller)
*Handful of shredded cheddar
*Squirt of hot sauce (I used sriacha)
*Egg (I used egg substitute-equivalent to 2 eggs)
*Seasoned bread crumbs
*Vegetable oil (or some other kind of oil-whatevs)

Split the jalapenos lengthwise and use your gloved (or Ziploc-ed) hand to scrape out the seeds and ribs and discard.


Melt your Velveeta a bit in the microwave and stir in shredded cheese and hot sauce. Stuff this mixture in each jalapeno, pinching the seam closed.

Dip the peppers in the egg, then bread crumbs and lay them all out for their fry bath.

Get your oil in a large skillet hot. Stick the handle of a wooden spoon in the oil to test and see if it is ready. If bubbles form around the spoon, you are good to go.

Fry the jalapenos in batches until golden brown & place on a paper towel to soak up extra grease.

Serve with ranch dipping sauce (ok, dressing squeezed from the bottle).


My husband’s verdict was that these were better than Sonic’s cheddar peppers which are his favorite. So, I guess it was all worth it :)





Friday, October 28, 2011

Fabulous Fall Fridays: Potato Soup


I love soup. I basically live on soup in the colder months. Well, that's not true. I don't eat soup for breakfast. Or dessert. But lunch and dinner are all about soups.

This potato soup is super vegified making it healthy and filling. I was going to say that this was a vegan dish, but I used chicken broth, so it's not. If you want to make it vegan, use vegetable broth.

Here's how easy this was:

Renee's Potato Soup

4 medium sized yellow potatoes
1/2 smallish bag of baby carrots
1 head of broccoli
1 box of chicken broth
garlic
salt + pepper
olive oil
*celery would be good in this, but I did not have any

Reserve one potato and cut up your other veggies. I cut up the carrots first. I cooked the extra potato in plastic in the microwave until done (about 4 minutes), then pureed it with a little broth in my food processor to add a thickness to the soup without using flour.

Get your pot hot and throw in some oil to coat the bottom. Then toss in your chopped carrots and let them cook while you chop your other vegetables. Put the potatoes in as you cut them. Once the potatoes and carrots are in, season them with garlic, salt and pepper and put a lid on the pot and let them cook for about 10 minutes (that seemed like a run on sentence-oh well). Add the broth and the chopped broccoli and bring to a boil. Simmer until the veggies are tender, and stir in your pureed potato to thicken.

This soup is great with some cheese and bacon on top and a side of crusty bread.

So colorful!


Friday, October 21, 2011

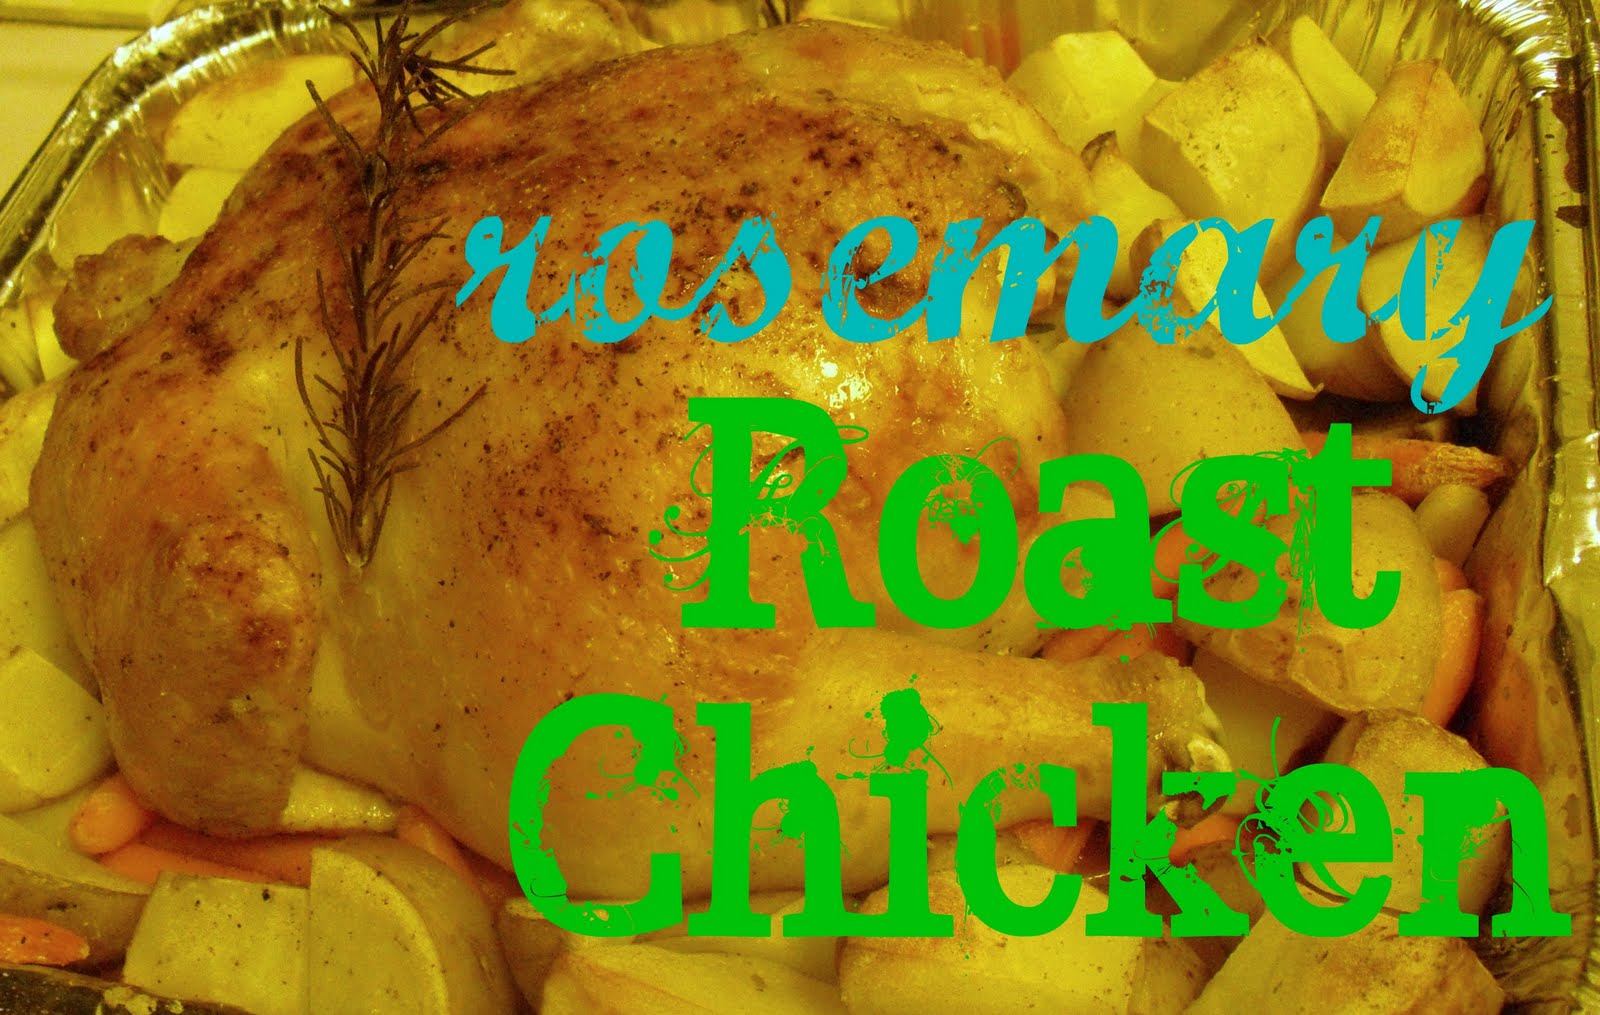
Fabulous Fall Fridays: Rosemary Roast Chicken


Brrr!! Fall has definitely arrived in our ‘hood. Time to bust out an old Fall favorite: roast chicken. Really, roast chicken is good any time of year, but I love to make it when it gets cooler outside so it fills the house with warm, comforting smells.

It might sound intimidating to roast a chicken, but really it is not hard at all. The hardest part is talking yourself into putting your hand in a chicken butt. Enter the Ziploc baggie:


Ok, here’s your ingredients. Let’s get started.


Renee’s Super Easy Rosemary Roast Chicken

3-4 lb whole chicken
½ a lemon
Head of garlic
½ onion (oops-not pictured)
4-5 sprigs of rosemary
4 tbsp butter
Salt + pepper

Ok, unwrap your bird and rinse it in the sink. Stick your hand in (with baggie on your hand if you want) and pull out the package of grossness and discard. Go to your happy place while doing this. It only takes a minute. Go ahead and rinse in there while you are at it. Pat the chicken dry with some paper towels.

Now put some butter, salt and pepper under the skin and a bit on top of the skin also. Shove your rosemary (or whatever herb you want to use), lemon, garlic and onion up the rump. Ok, you’re pretty much done in there.
Put the prepped bird in a roasting pan and surround with whatever veggies you like. I just used potatoes, carrots and onion. Season your veggies and toss in some herb sprigs for extra flavor.

Now, if anyone were ever to buy me a roasting pan, it would probably not get much use in the kitchen. I don’t want one. I buy disposable ones because I want to throw them away and not wash them (plus, they are only like a buck). I know it is totally not “green” but I know if I had a roasting pan to wash, it would just sit on the counter and would not get washed until my mom happened to visit.

Roast at 400 degrees for about an hour and 15 minutes or until juices run clear (internal temperature of 180 F).


Yum yum! You should make this for someone you want to impress. Or just for yourself. The leftovers make great sandwiches!


Um, on an completely unrelated note: Have you seen this blog?

http://ryangoslingdisneylandcats.tumblr.com
So hilarious! Features pictures of Ryan Gosling at Disneyworld with cats. For some reason I find this amusing. Here’s one of my favorites:


Have a great weekend, everyone!

Thursday, October 13, 2011

Fabulous Fall Fridays: Pumpkin Snickerdoodle Cookie Bars


Yay! It's Friday :)
Here's another great Fall recipe for you to try. These cookie bars are pillowy and cake-like and have a subtle pumpkin flavor. The cinnamon sugar topping gives it an almost coffee cake taste. So good with coffee! Or milk.

Pumpkin Snickerdoodle Cookie Bars
recipe adapted from Recipe Girl

For the Bars:
1 stick of butter, softened
3/4 cups mixed brown and white sugar
1/2 cup pure unsweetened pumpkin puree
1 large egg
1 teaspoon vanilla extract
2 1/2 cups all-purpose flour
3/4 teaspoons baking powder
1/4 teaspoon salt
1/4 teaspoon ground cinnamon
3/4 cups white chocolate chips

Sugar and Spice Mixture:
1/4 cup mixed brown and white sugar
1/2 teaspoon ground cinnamon
1/4 teaspoon ground ginger
1/4 teaspoon allspice

Directions:
1. In a large bowl, use an electric mixer to cream the butter until fluffy. Add sugar and pumpkin puree and beat well. Mix in egg and vanilla, scraping down sides of the bowl to incorporate all of the ingredients.

2. In a medium bowl, whisk together flour, baking powder, salt and ground cinnamon. Beat flour mixture into liquid mixture a little at a time just until incorporated. Stir in the white chocolate chips last.

3. Preheat oven to 375°F. Line 9x9 pan with parchment paper (or spray with nonstick spray). Mix spices and sugar ingredients in a small bowl.

4. Press 1/2 of the dough into the pan (I used a Ziploc on my hand to press it down), pour half of the sugar mixture on the top. Add the remaining dough and top with the rest of the sugar and spice mix.

6. Bake at 375°F. for 23-25 minutes.


These bars were so rad that I had to package them all up so I couldn't eat anymore! I'm sure I can find some willing taste-testers out there to take them off my hands.

On a slightly separate note, I went for the first time to Yogurt Mountain and they have PUMPKIN PIE FROZEN YOGURT and it is the bomb diggity. I topped it with pecans, honeyed granola and crushed Butterfinger. Holy moly. I may have uttered some expletives while driving down the road eating this (don't try this at home, kids).

My point is-go there and try it. Tell them I sent you. I'm sure they will look at you crazy.

Friday, October 7, 2011

Fabulous Fall Fridays: Roasted Butternut Squash Risotto


Ok, I know a lot of blogs out there switch over to all Fall recipes once the season starts. Since I am not really down with that, I thought I’d feature a Fall recipe every Friday. Let’s call it Fabulous Fall Fridays, shall we?

This first one is a real doozy. What does that even mean? They always say it in Bugs Bunny cartoons. I think it means it’s mind blowing. And this roasted butternut squash risotto is totally out of this world delicious.

If you have never made risotto because it sounds intimidating, try this because it was pretty easy. You just can’t leave the room and forget about it (that’s my husband’s style of cooking).

If you are looking for comforting Fall flavors, you’re welcome, friends.

Roasted Butternut Squash Risotto

1 medium butternut squash
1 cup orzo (you could also use Arborio rice—I just had some orzo I wanted to use)
2 ½ cups chicken broth
2-3 Tbsp olive oil
½ cup grated (or shredded) parmesan cheese
Garlic to taste
Salt to taste
Rosemary or another fresh herb (like thyme, sage or parsley)
4 slices cooked bacon, chopped

1. Cut the top and bottom off your butternut squash, then cut down the center long ways. Pull out the seeds and pulp and discard. Peel and dice the squash and line a 9x13 baking dish with the chunks. Drizzle olive oil, garlic and salt over the top and lay some sprigs of rosemary on the top. Roast at 450 degrees for 20 minutes. Your house will smell of rosemary and garlic after this, so enjoy that (discard rosemary sprigs after roasting).

*My butternut squash made 3 ½ cups of chunks. Incidentally, you can also buy it already diced in the produce section of Wal-mart (or maybe at other places—I don’t know) and either roast it or steam it in the microwave.

2. You can either puree all of your cooked butternut squash or just do half of it like I did. I wanted some chunks in my risotto.

3. Heat a medium sized pot over medium heat and add 1-1/2 Tbsp of olive oil. Pour in your rice after the oil gets heated for a few minutes and stir to coat the rice in the oil. Toast your rice in the oil for about 3 minutes. Stir it the whole time (or most of the time) it is toasting.

4. Add 1 cup of chicken broth to toasted rice and stir, stir, stir. Stirring is essential in risotto, I’ve heard. Once that liquid is absorbed for the most part, add another cup of chicken broth and repeat.

5. Add ½ cup of broth after the 2nd cup is absorbed and stir some more. Never stop stirring (okay, you can stop for like two seconds if you need to, but stick with it). Taste the rice and see if it is done-ish. I wanted mine to be tender but still have a little bite. Season to taste.

6. Stir in pureed squash, cubed squash, parmesan and bacon. Garnish with sprinkle of bacon and cheese and a sprig of rosemary.

*This took me about 15-17 minutes from the addition of the first cup of broth. I’m sure cooking time would vary depending on your stove and the type of rice (or rice-like pasta) you use.

Serves 2 for main dish or 4 side dishes.


I brought this for lunch today. I kind of want it now, despite the fact that it is 8:45 a.m. and I’m still full from breakfast (oats in a jar). It is that good.